
How to connect Cloudflare Stream in RootWright LMS
Cloudflare Stream hosts lesson videos for RootWright LMS Pro. You upload a video from the lesson builder, Cloudflare encodes it, and students watch it in Cloudflare's player inside the lesson.
Pro
Cloudflare Stream is a video provider in RootWright LMS Pro.
Before you start
- A Cloudflare account with Stream enabled.
- Your Account ID, shown on the Stream page of the Cloudflare dashboard.
- An API token with Stream:Read and Stream:Edit for this account. Create it at
dash.cloudflare.com/profile/api-tokens. Use a scoped token, not the Global API Key. - Your customer subdomain, for example
customer-a1b2c3d4.cloudflarestream.com. Cloudflare shows it in any video's embed code.
Connection fields
| Field | Required | What it does |
|---|---|---|
| Account ID | Yes | Identifies your Cloudflare account. |
| API Token | Yes | Lets RootWright LMS upload and read videos. Limit it to Stream:Read and Stream:Edit. |
| Customer Subdomain | Yes | The playback hostname. Students play videos from this address. Without it, a video can be picked and never played. |
| Upload as signed-URL only | No | Off by default. When on, new uploads play only with a signed token. See the warning below. |
Connect Cloudflare Stream
- In WordPress, go to Settings → Integrations → Video & storage.
- On the Cloudflare Stream card, click the edit icon.
- In Cloudflare Stream settings, enter the Account ID, the API Token and the Customer Subdomain.
- Leave Upload as signed-URL only off unless you have set up signing keys.
- Click Save.
- Switch on the Cloudflare Stream card.
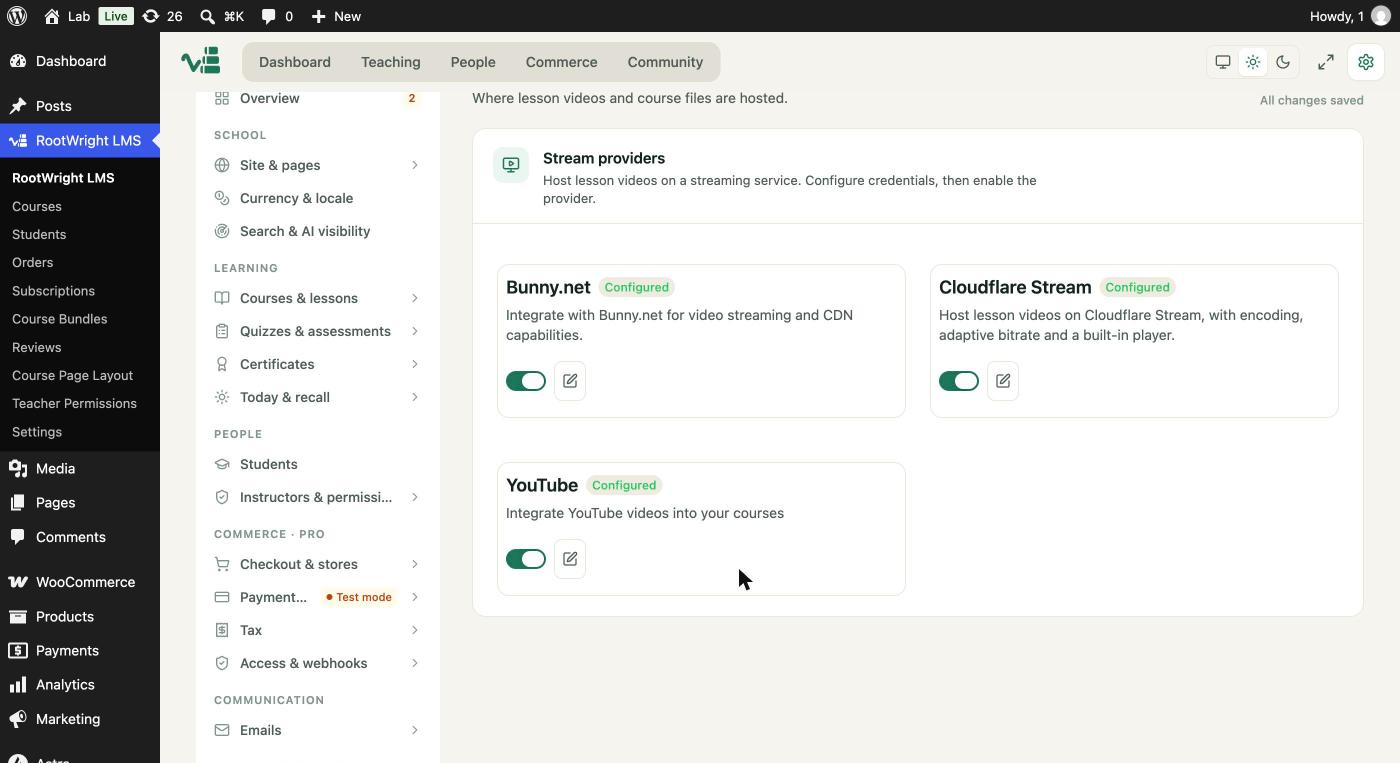
Settings → Integrations → Video & storage. The Cloudflare Stream card shows Configured once the settings are saved. Switch it on to use it.
The settings form has no Test connection button. To check the setup, upload a short test video in a lesson.
Upload a lesson video
- Open the lesson in the lesson builder and choose the Video with Caption lesson type.
- Upload a file, or pick a video that already exists in the video picker.
- Wait for the video to finish encoding. The picker shows the video as not ready until Cloudflare has encoded it.
Screenshot to add
What: The video picker in a Video with Caption lesson with a Cloudflare Stream video listed.
How to get there: Open a Video with Caption lesson in the lesson builder and open the video picker after uploading one short test video.
Save as: docs/public/images/integrations/cloudflare-stream-02-video-picker.jpg (1440×900 window, JPG)
Then: replace this box with: 
Cloudflare uploads go in a single request. The file is limited by PHP's upload limit on your host. For larger videos, use Bunny.net, which uploads in chunks.
For the accepted formats and the other upload settings, see Video & storage.
Signed URLs
Turn on Upload as signed-URL only only if you have set up signing keys in Cloudflare. A video that requires a signed URL does not play in the lesson player unless it is signed.
Messages you may see
When Cloudflare returns its own error message, RootWright LMS shows that message instead.
- "Cloudflare rejected the token (401) — check that it has Stream:Read and Stream:Edit on this account." Create a new API token with those two permissions, and enter it again. The number is the status Cloudflare returned, and a 403 shows the same message with 403.
- "Not found (404) — check the account ID, or the video no longer exists." Check the Account ID. If the message is about a video, the video may have been deleted in Cloudflare.
- "Cloudflare returned status …" Cloudflare returned an error that has no message of its own. Try again, and check the Account ID and the API token.
- "Cloudflare accepted the upload but returned no video id." Try the upload again.
Related
- Video & storage for upload limits, watermarks and the other providers.
- Bunny.net Stream and YouTube for the other video providers.