
How to set up Stripe and PayPal in RootWright LMS
RootWright LMS Pro takes payments on its own checkout through Stripe or PayPal. No store plugin is needed. Set the keys under Settings → Commerce → Payment gateways.
Pro
Payment gateways are part of RootWright LMS Pro.
Test mode and live mode
Each gateway has a Mode dropdown. Start in Sandbox (testing). Real cards are declined in sandbox, so only test payments go through.
The banner at the top reads Test mode on. Real cards are declined. Click Switch to live when you are ready. The banner also appears under Needs attention on the Settings overview until live keys are saved.
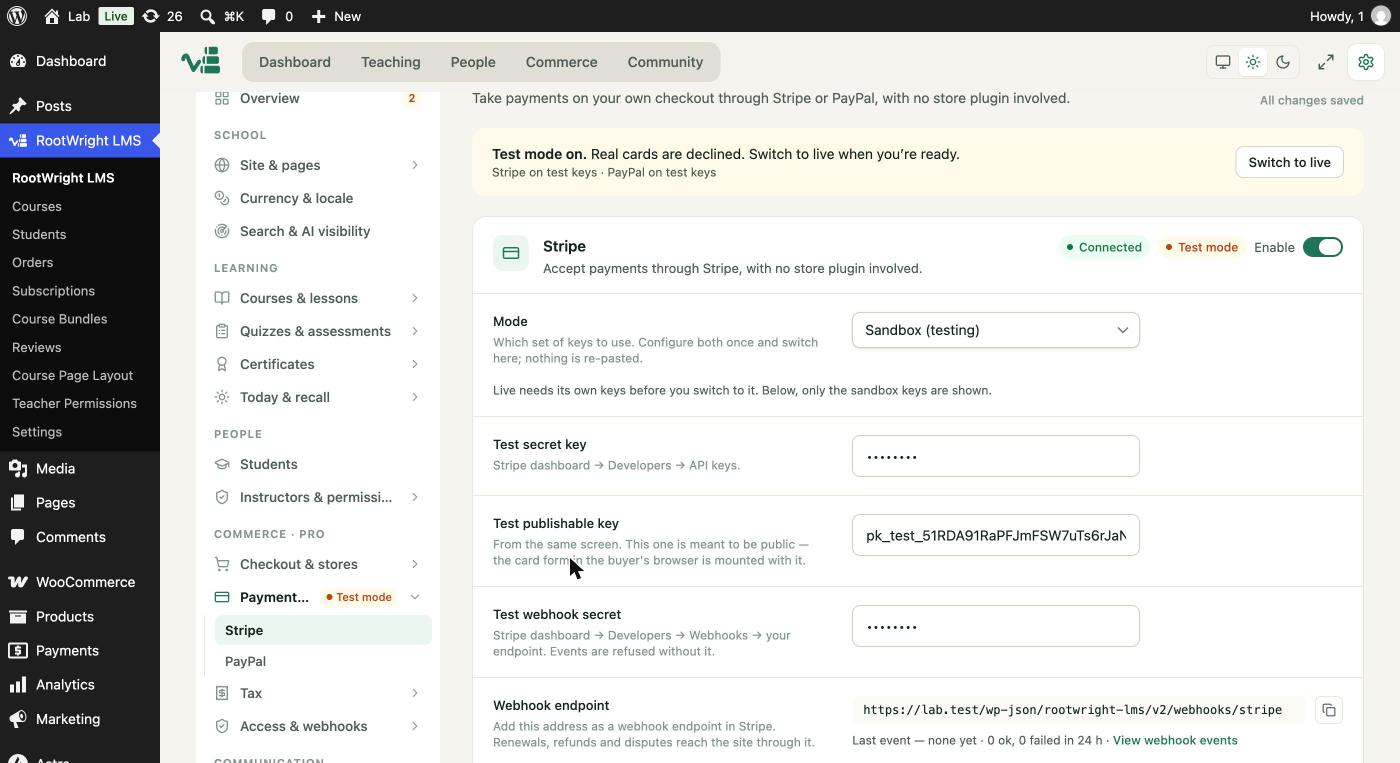
Settings → Commerce → Payment gateways → Stripe. Stripe shows Connected and Test mode once the keys are saved.
Stripe
- Open Payment gateways → Stripe.
- Enter the Test secret key and Test publishable key from the Stripe dashboard under Developers → API keys.
- Enter the Test webhook secret from Developers → Webhooks, then copy the Webhook endpoint that RootWright LMS shows into your Stripe webhook.
- Switch on Enable.
- To go live, enter the live keys and webhook secret, then change Mode to live.
Events are refused unless the webhook secret matches. Stripe handles one-time payments, subscriptions, refunds, and cancel at the end of the period. PayPal handles one-time payments, subscriptions and refunds.
PayPal
- Open Payment gateways → PayPal.
- Enter the Sandbox client ID and Sandbox client secret from the PayPal Developer dashboard, under Apps & Credentials.
- Add a webhook for the Webhook endpoint shown on the screen, then enter its ID in Sandbox webhook ID. PayPal checks every event against this ID, and events are refused without it.
- Switch on Enable.
- For live payments, enter the live client ID, client secret and webhook ID, then change Mode to live.