
Create your first course in RootWright LMS
This walkthrough builds a complete beginner course: a title, two modules, lessons, a quiz and a published course page. It takes about 10 minutes. The example course is Intro to Watercolor Painting.
1. Add the course
Go to RootWright LMS → Courses, then click Add a course. The course editor opens on the Details section.
Enter a Course Title and a Course Description, then click Save & continue. The other sections unlock once the course is saved.
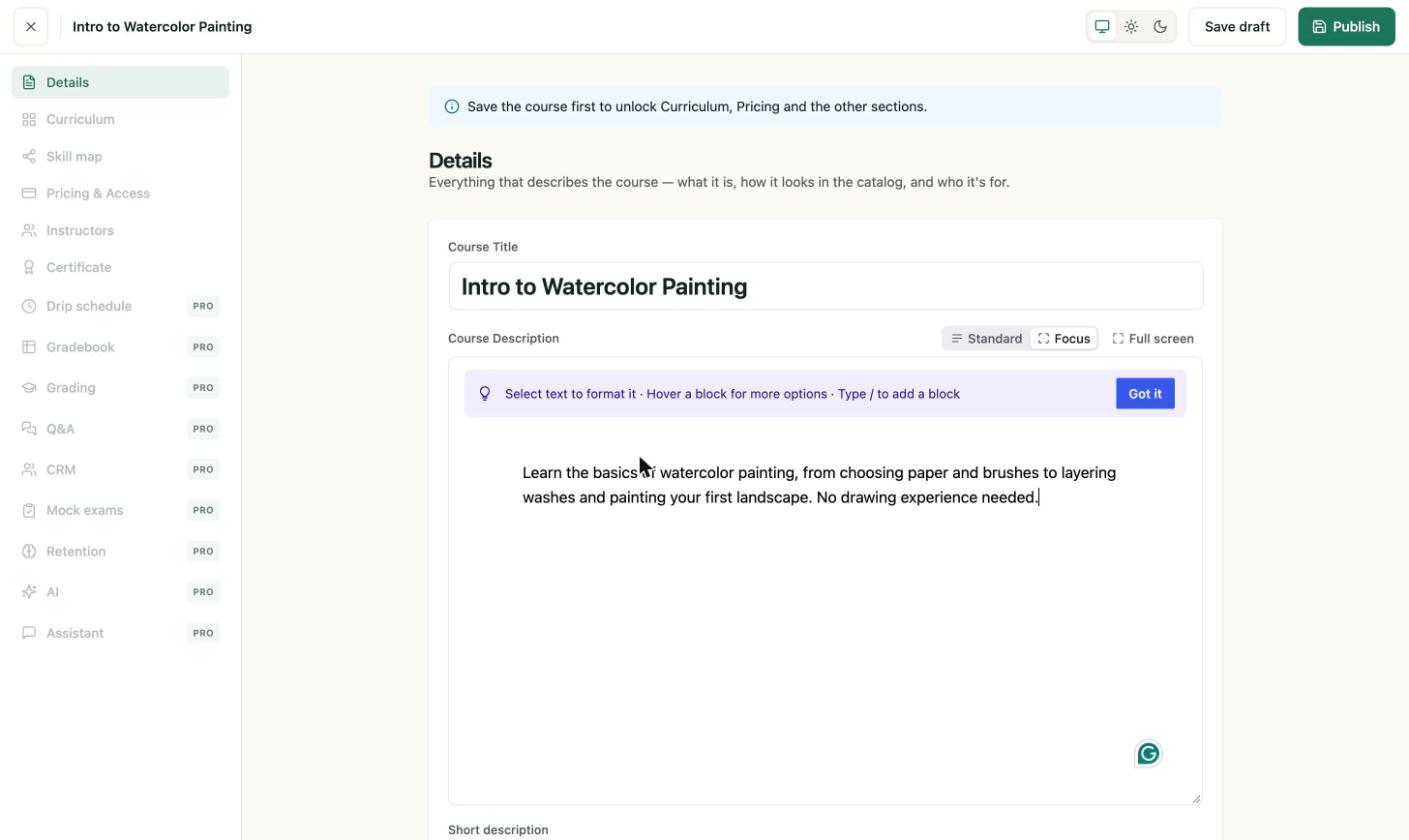
The Details section. Set the level, duration and format under Classification.
2. Build the curriculum
Open Curriculum. Click Add module, give it a title, and click Create module. Then type a lesson title in the module's field and press Enter. The lesson opens in the lesson builder.
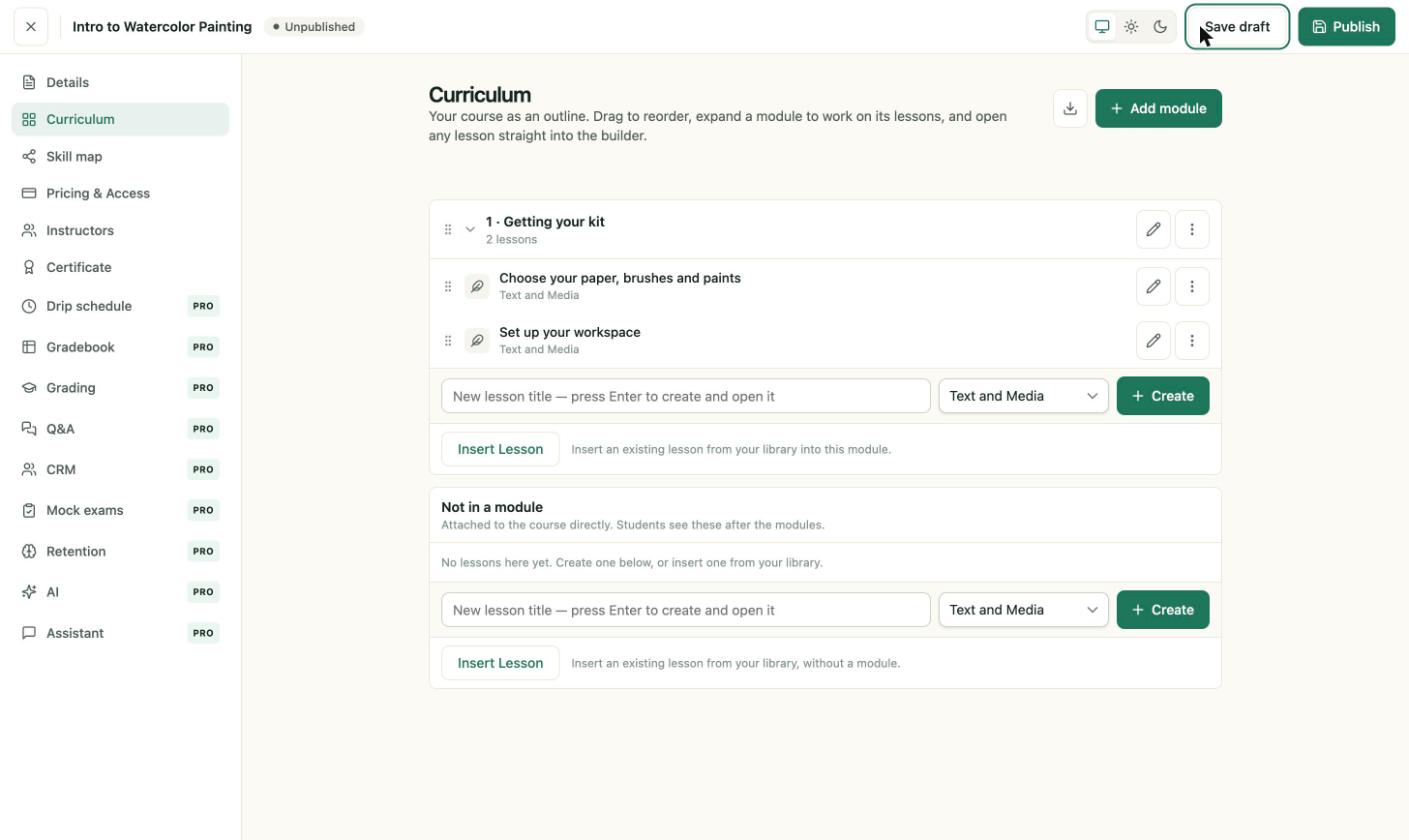
Two modules with lessons. Lessons not inside a module appear under "Not in a module".
3. Add a quiz
In the module, set the lesson type to Quiz, name it and press Enter. In the quiz block, click Add a question, type the question, add the answers and tick the correct one. Then open the quiz block's Settings to set the pass percentage. See Create a quiz.
4. Set the price and access
Open Pricing & Access. A course with no price is free: students enroll at no cost. To sell it, add a price. See Course settings and access.
5. Publish
Click Publish in the top bar. The button changes to Update and the course status shows Published. Visitors can now find the course in the catalog.
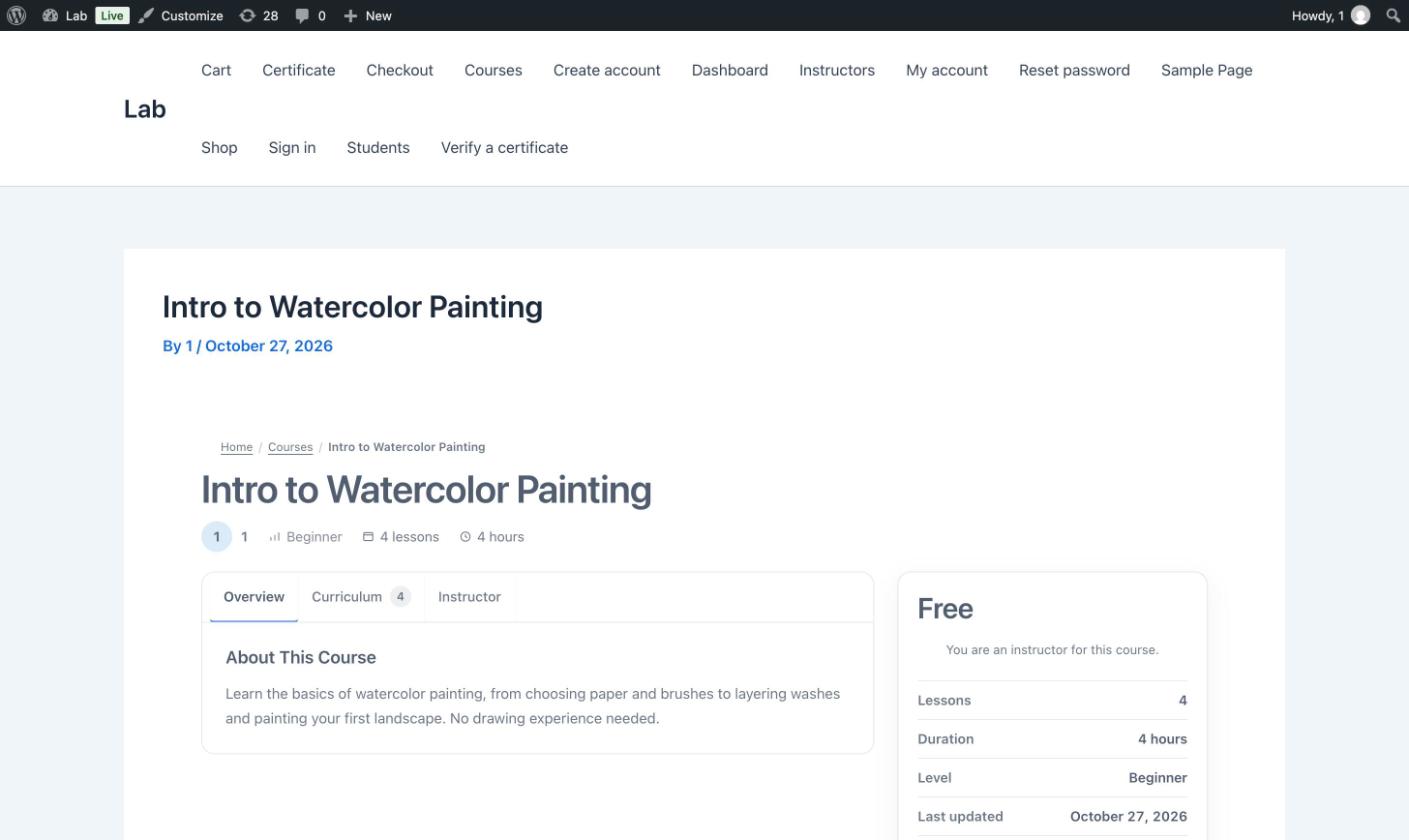
The public course page at /course-catalogue/. It shows the level, lesson count and duration.
6. Enroll a student
Go to People → Students → Add students, choose New account or an existing user, pick the course under Enroll in courses, and click Create account. See Enroll students.
Next steps
- The Courses screen to manage every course.
- Course builder for modules, lessons and the lesson types.