
How to design certificates in RootWright LMS
A certificate is the document students receive when they complete a course. In RootWright LMS, certificate designs live under Settings → Learning → Certificates → Designs. The starred design is the site default, and each course can pick a different one.
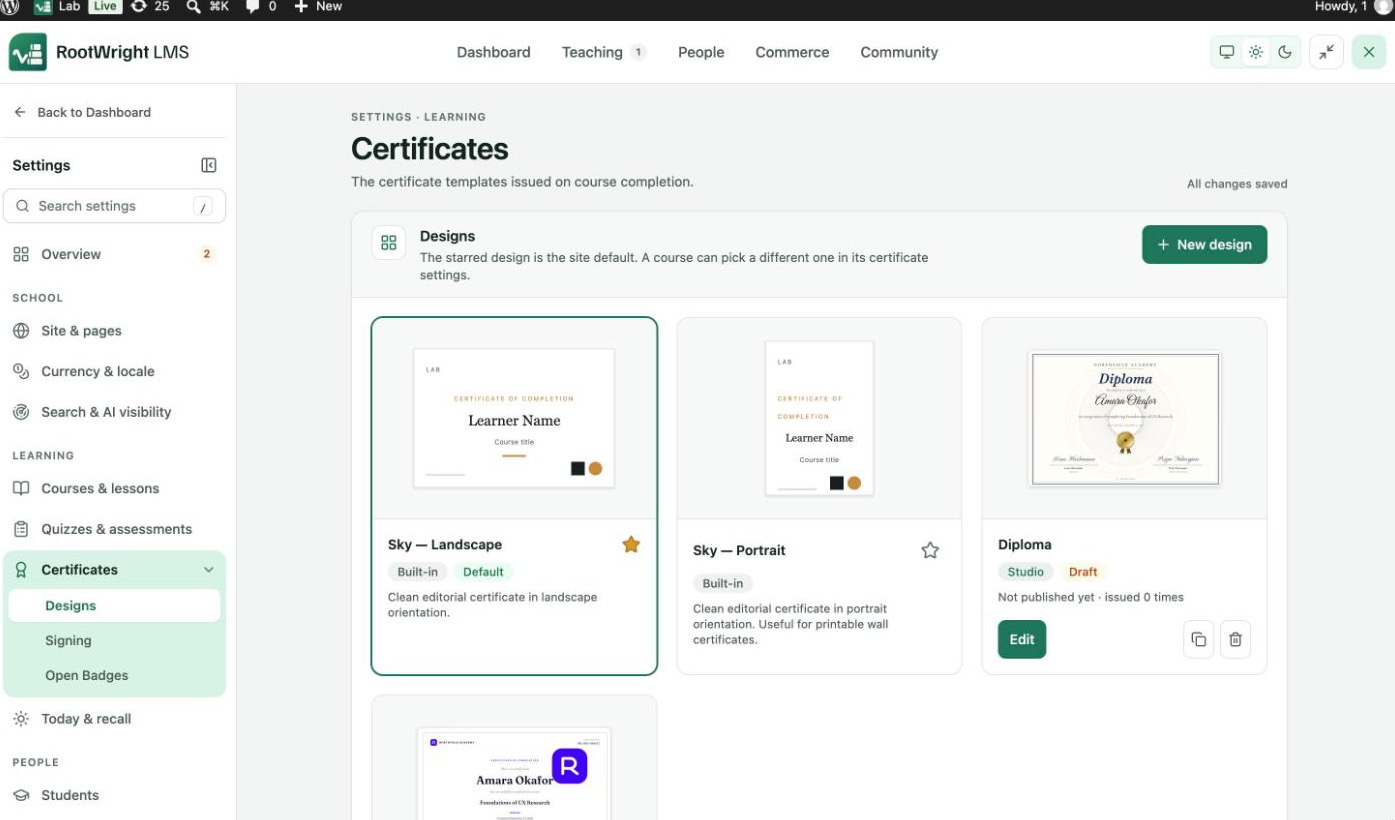
Settings → Certificates → Designs. Built-in designs come with the plugin. Studio designs are ones you built.
The built-in designs
RootWright LMS ships two designs:
- Sky — Landscape, a clean landscape layout. It is the default until you star another.
- Sky — Portrait, the same look in portrait, useful for printable wall certificates.
Click a built-in design to brand it. A drawer opens with these fields:
| Field | What it does |
|---|---|
| Brand name | Shown in the header and the verified seal. |
| Brand logo | A square or circular logo, about 80 by 80 pixels. |
| Signer name | Printed under the signature. |
| Signer title | The role of the person signing, for example "Head of Learning". |
| Signature image | A transparent PNG works best. |
| Accent color | The underline color beneath the course title. |
Click Preview with sample data to see it with placeholder text, then Save changes.
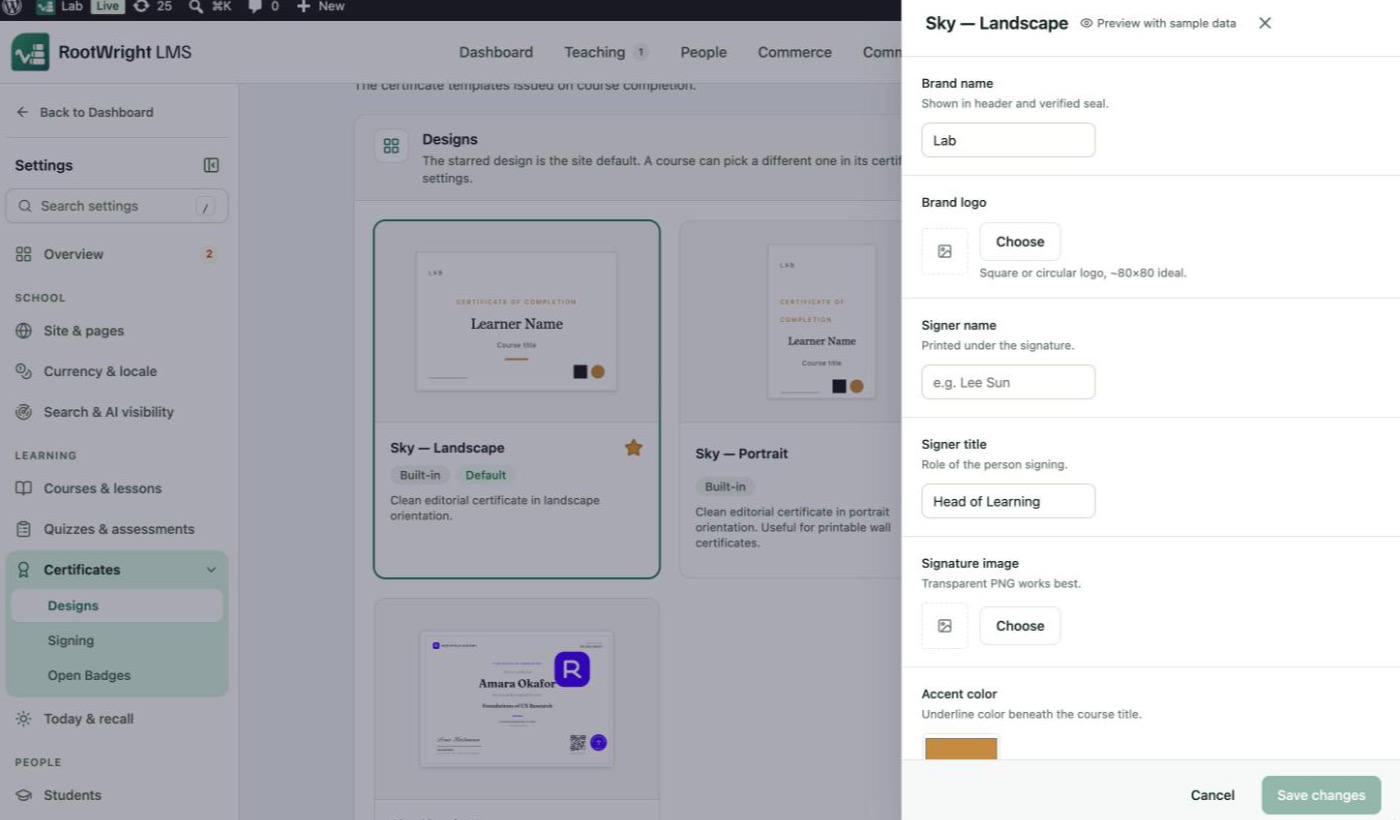
Clicking a built-in design opens its fields.
To make a design the site default, click its star.
Build your own design in the studio
Pro
The certificate studio needs RootWright LMS Pro. Only site administrators can design certificates.
Click New design on the Designs gallery, or Edit on a Studio design. The certificate studio opens.
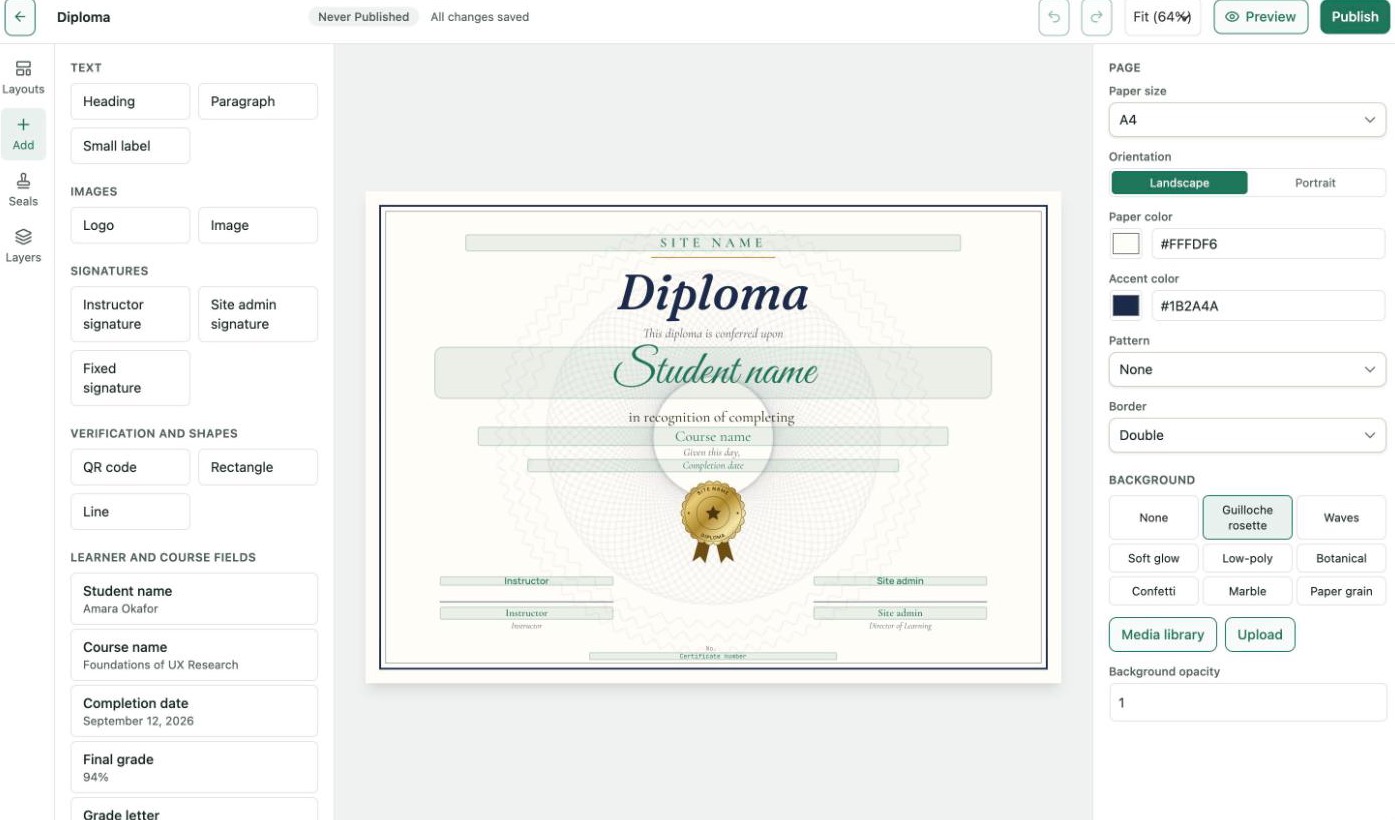
The studio. The left rail has Layouts, Add, Seals and Layers. The right panel sets the page or the selected element.
The left rail
| Panel | What it holds |
|---|---|
| Layouts | Ready-made starting points, filtered by All, Classic, Modern, Formal and Fun: Sky Classic, Ledger, Academy, Studio, Diploma, Midnight, Minimal, Horizon, Botanical, Compliance and High Five. |
| Add | Elements to place: text (Heading, Paragraph, Small label), images (Logo, Image), signatures (Instructor signature, Site admin signature, Fixed signature), QR code, Rectangle, Line, and learner and course fields. |
| Seals | Seal styles, and Your saved seals. To save a seal, select it on the page and use Save to library in its settings. |
| Layers | Every element on the page. Rename, hide, lock or unlock them. |
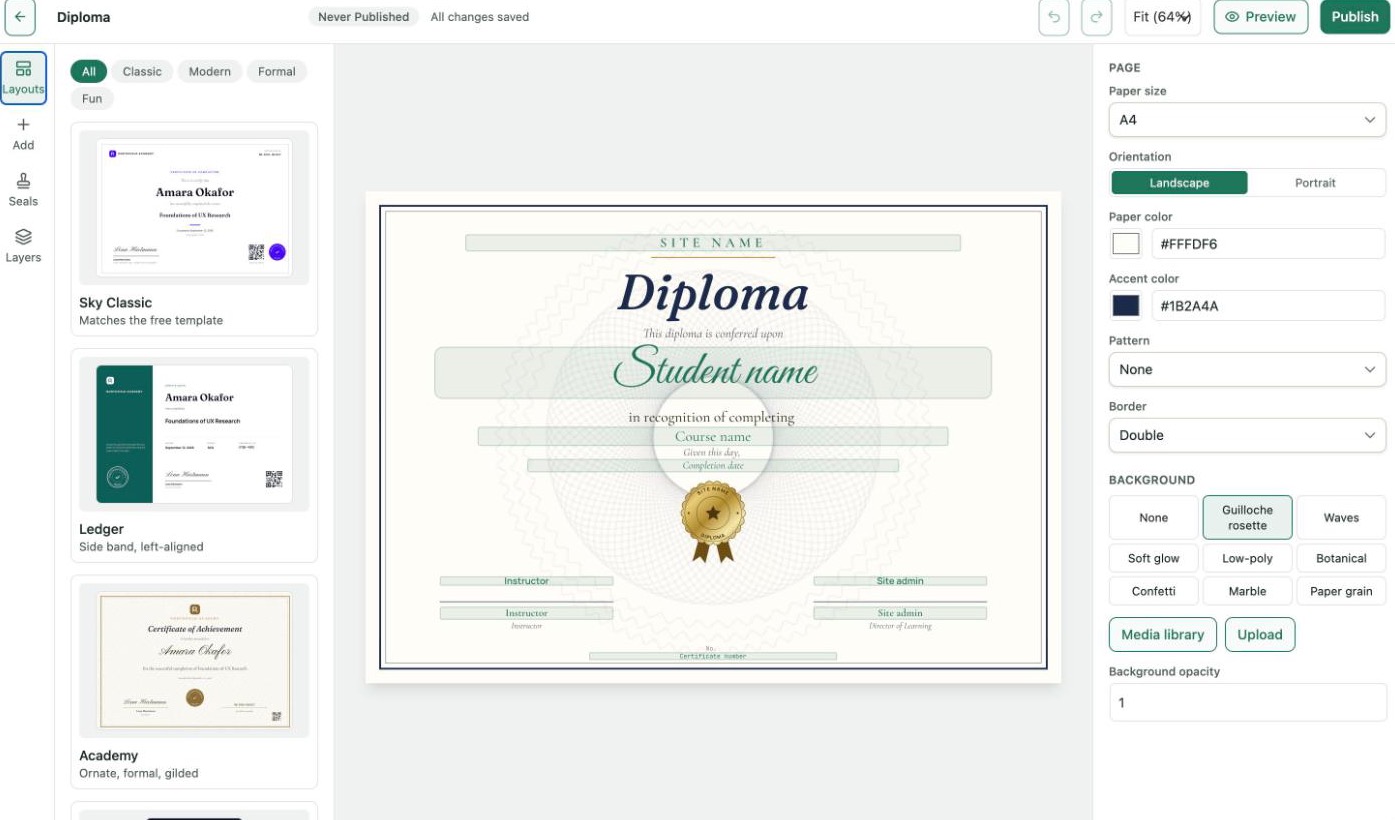
Layouts. Each one shows sample data.
Learner and course fields
These fields fill in for each student when the certificate is issued: Student name, Course name, Completion date, Final grade, Grade letter, Grade percentage, Course hours, Instructor, Site admin, Certificate number, Credential code, Verify link, Site name, CE credits and Expiry date. In the studio they show sample values.
Page settings
With nothing selected, the right panel sets the page: Paper size, Orientation (Landscape or Portrait), Paper color, Accent color, Pattern, Border, a Background (None, Guilloche rosette, Waves, Soft glow, Low-poly, Botanical, Confetti, Marble or Paper grain, or your own from Media library or Upload), and Background opacity.
Save, preview and publish
- The studio saves as you work. The top bar says "All changes saved".
- Use the undo and redo arrows, and the zoom menu (Fit, 50% to 200%).
- Preview shows the certificate with sample learners.
- Publish makes the design available to courses. Until then the gallery card says Draft and "Not published yet". Each publish is a numbered revision.
- After publishing, later edits are a draft until you Publish changes. You can also discard the unpublished changes, and the draft goes back to the published design.
A design with a Site admin signature cannot be published until someone is set under Signing. See below.
On the gallery, a Studio design's card also has Duplicate and delete. Deleting removes the design with its published revisions, and cannot be undone.
Signing
Pro
Signing needs RootWright LMS Pro.
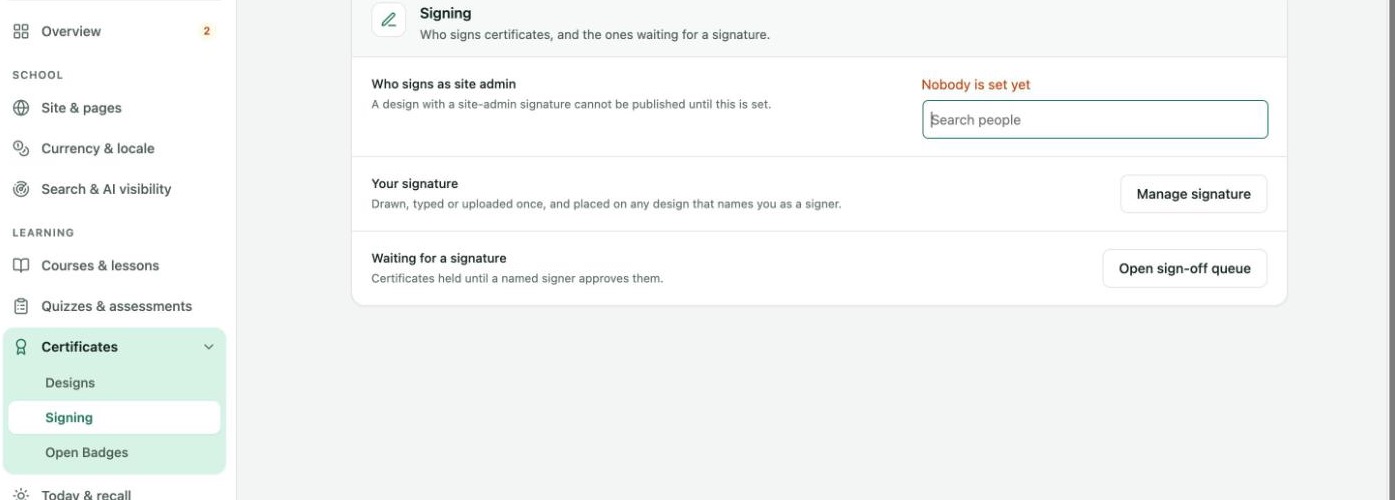
Settings → Certificates → Signing.
| Setting | What it does |
|---|---|
| Who signs as site admin | The person whose signature fills a Site admin signature on a design. Until it is set, the screen says "Nobody is set yet". |
| Your signature | Manage signature opens your signature, drawn, typed or uploaded once, and placed on any design that names you. |
| Waiting for a signature | Open sign-off queue opens the certificates held until a named signer approves them. See Certificate sign-off. |
Award a certificate in a course
- Open the course in the course builder and click Certificate.
- Under Award a certificate, choose Automatically, on completion, Only when an instructor issues it or Automatically, if the student meets my criteria. No certificate is the default. See Conditional certificates for the criteria.
- Under Certificate design for this course, leave Site default or pick a design for this course only. Only published designs are listed.
- Under Who signs this certificate, each signer clicks Add your signature if they have not added one yet.
- Save the course.
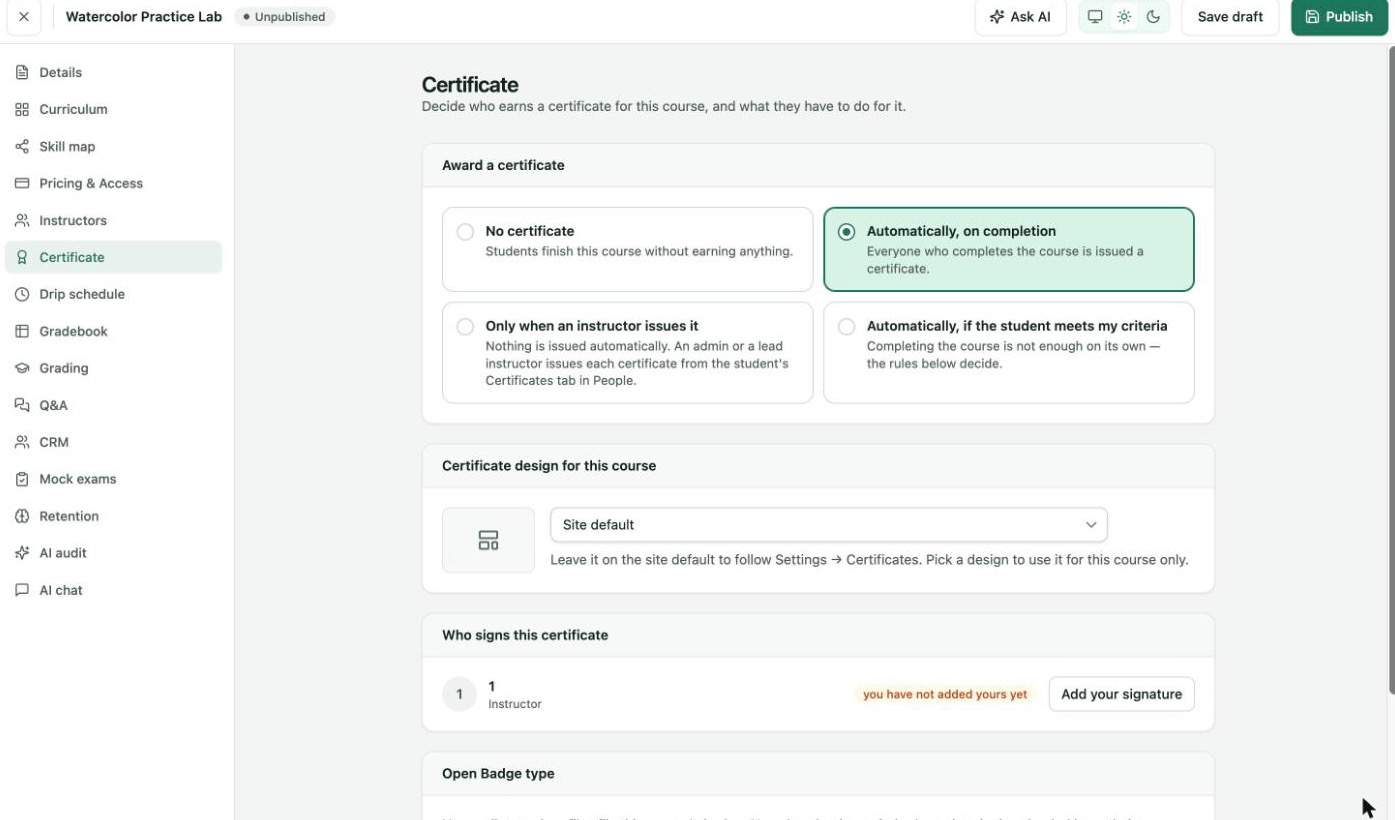
Choosing an option shows the design, signers and, with Pro, the Open Badge type.
Until each signing instructor adds a signature, approvals are refused. The sign-off queue is under Teaching → Certificate sign-off.