
How to connect Bunny.net Stream in RootWright LMS
Bunny.net Stream hosts lesson videos for RootWright LMS Pro. You upload a video from the lesson builder, Bunny encodes it, and students watch it in Bunny's player inside the lesson.
Pro
Bunny.net is a video provider in RootWright LMS Pro.
Before you start
- A Bunny.net account with at least one Stream video library.
- The library's API key. Find it in the Bunny Stream dashboard at
panel.bunny.net/stream. - The library's Library ID.
- Optional: the CDN hostname and Pull Zone ID for the library's pull zone.
Connection fields
| Field | Required | What it does |
|---|---|---|
| API Key | Yes | Lets RootWright LMS talk to Bunny. The field is a password field. |
| Default Library ID | Yes, for uploads | The library used when you upload a video and do not pick one. |
| Default Player Library ID | No | The library used for the player when a video does not record its own library. Leave it empty in most cases. |
| CDN URL | No | Your pull zone's hostname, for example https://yourzone.b-cdn.net/. Leave it empty to use the default. |
| Pull Zone ID | No | The pull zone used for CDN operations. |
| Enable CDN Caching | No | On by default. Turns on caching for faster playback. |
Connect Bunny.net
- In WordPress, go to Settings → Integrations → Video & storage.
- On the Bunny.net card, click the edit icon.
- In Bunny.net settings, enter the API Key and the Default Library ID. Fill in the optional fields if you need them.
- Leave Enable CDN Caching on, and click Save.
- Switch on the Bunny.net card.
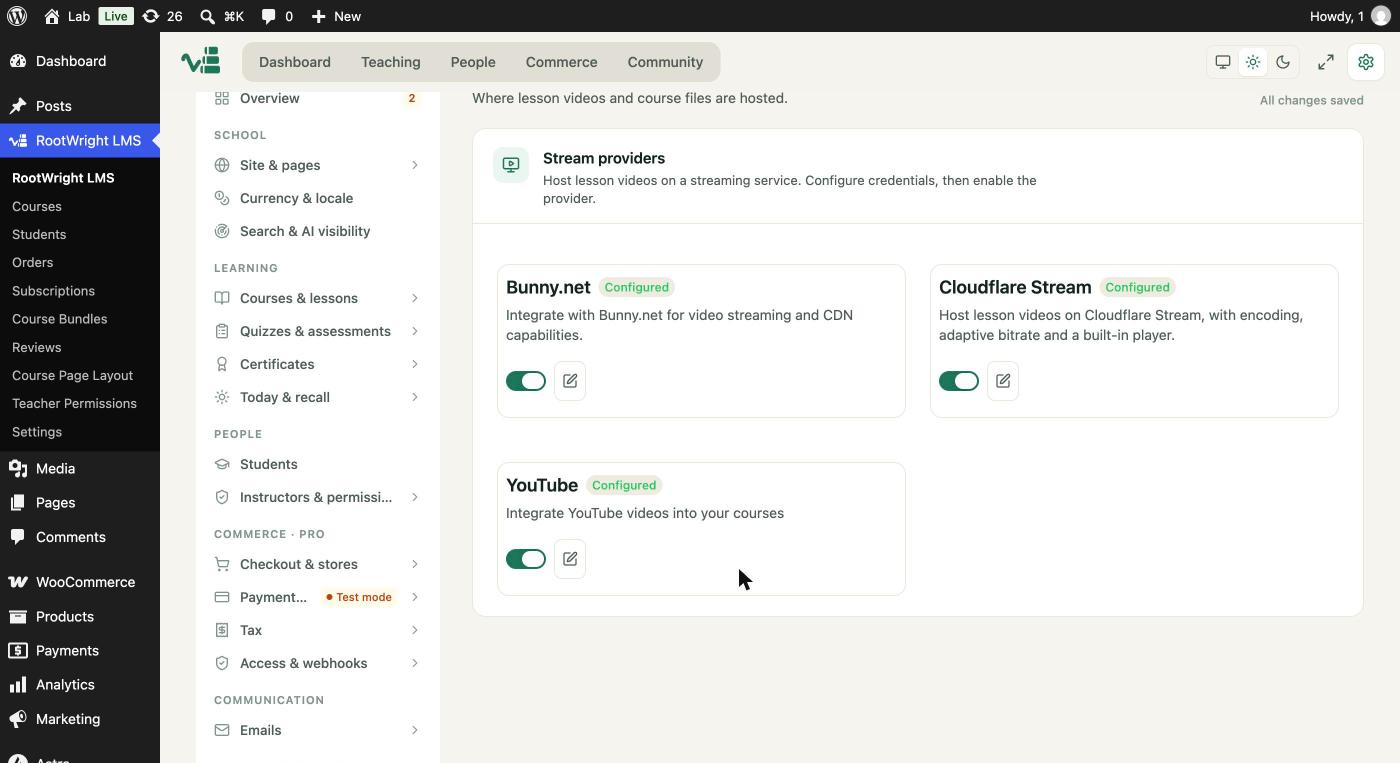
Settings → Integrations → Video & storage. The Bunny.net card shows Configured once the settings are saved. Switch it on to use it.
The settings form has no Test connection button. To check the setup, upload a short test video in a lesson.
Upload a lesson video
- Open the lesson in the lesson builder and choose the Video with Caption lesson type.
- Upload a file, or pick a video that already exists in the video picker.
- Wait for the upload to finish. Bunny then encodes the video. Students can watch it once encoding is done.
The browser uploads the file straight to Bunny in chunks, using Bunny's upload endpoint. A large video does not pass through your WordPress server.
For the upload size limit and the accepted formats, see Video & storage.
Screenshot to add
What: The video picker in a Video with Caption lesson, with the upload control and an existing Bunny video listed.
How to get there: Open a Video with Caption lesson in the lesson builder and open the video picker after one test video has finished encoding.
Save as: docs/public/images/integrations/bunny-stream-02-video-picker.jpg (1440×900 window, JPG)
Then: replace this box with: 
Choose a library for a course
The video picker lists the videos in one Bunny library at a time. To use a different library for a course, choose it in the picker. RootWright LMS remembers the library for that course, so later uploads for the course go to the same library. Other courses keep using the Default Library ID.
How students watch
Students watch the video in Bunny's player, which runs from iframe.mediadelivery.net. The player uses the library the video was uploaded to. The Default Player Library ID applies only when that library is not recorded for the video.
Messages you may see
- "No Bunny Stream library selected. Set a Default Library ID in Settings → Integrations → Providers, or pick a library in the video picker before uploading." Set the Default Library ID on the Bunny.net card, or choose a library in the video picker. The message names an older screen. The card is under Settings → Integrations → Video & storage.
Related
- Video & storage for upload limits, watermarks and the other providers.
- Cloudflare Stream and YouTube for the other video providers.
- Zoom and Google Meet for live classes.